Custom Layouts
When Row, Column, and Grid don’t fit, you can write your own layout algorithm and plug it into AutoLayout. This page walks through the API by building a working Ring layout that arranges children in a circle.
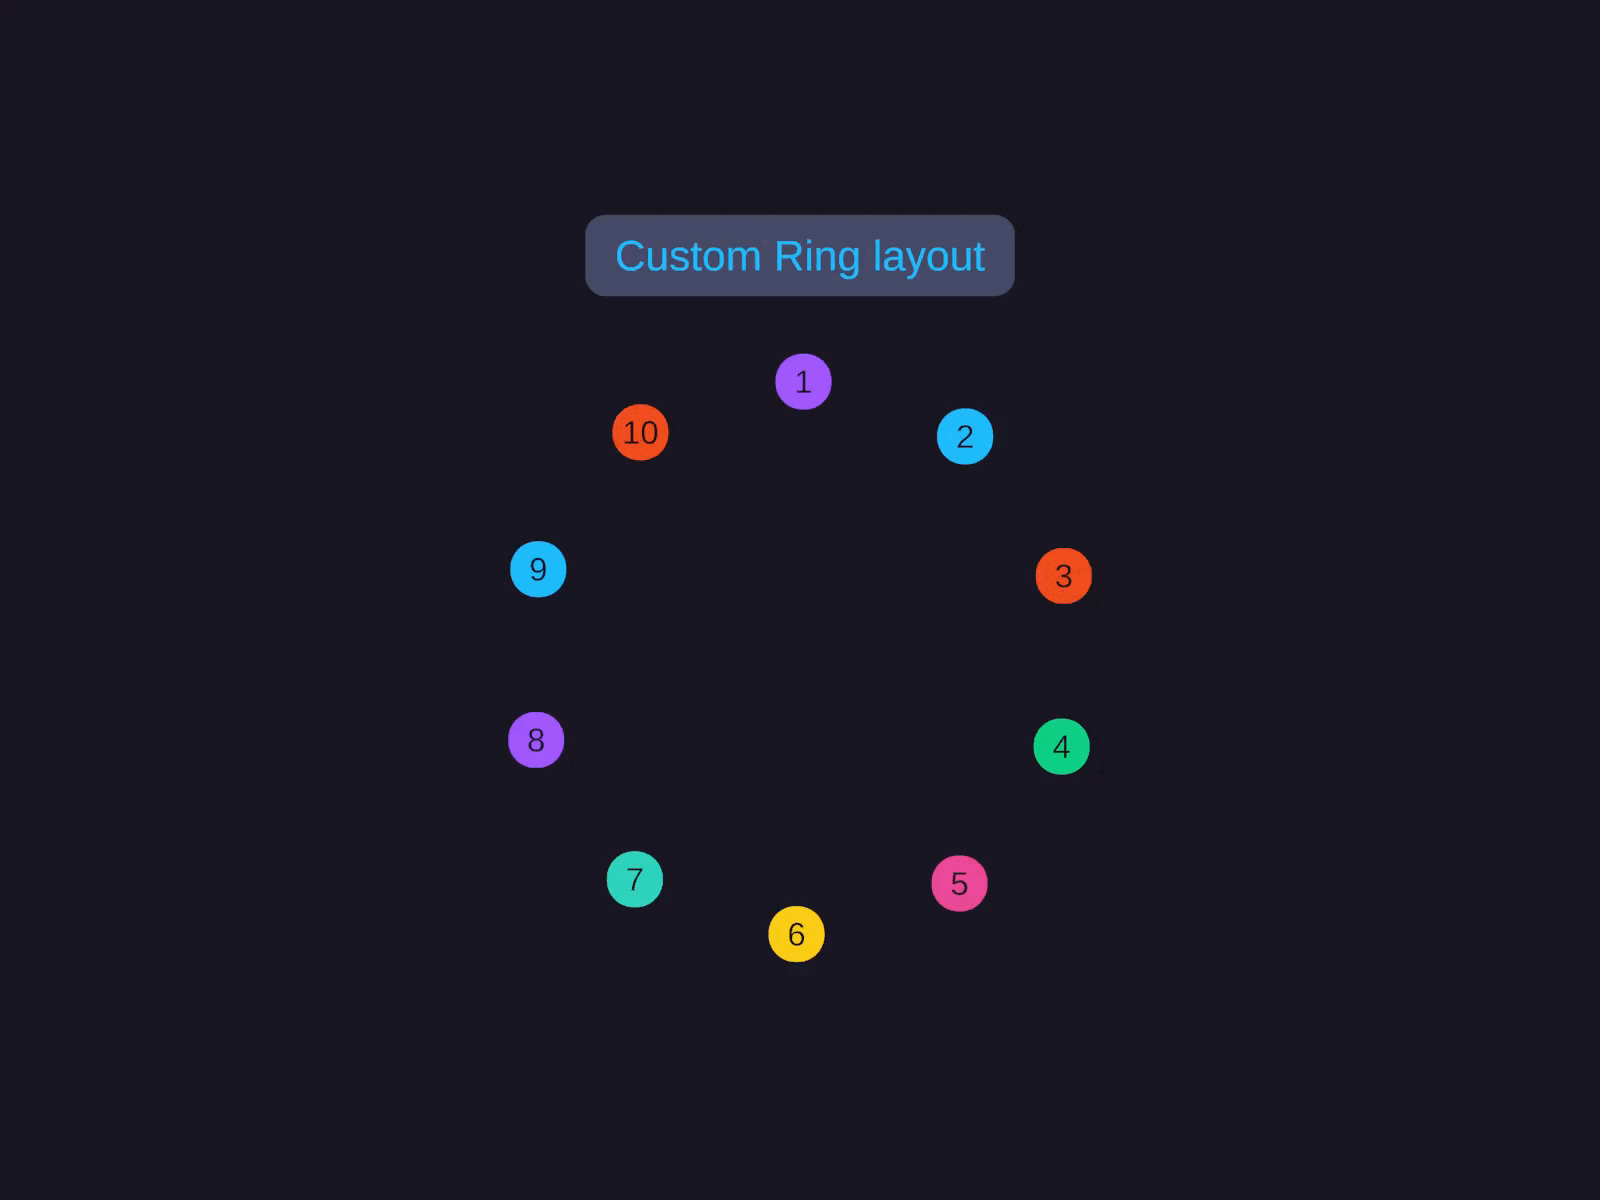
Ring layout
Children arranged evenly around a circle by a custom layout algorithm. The full implementation is below — register the algorithm once, then assign it by ID per element.
Set Layout Type to Custom. A custom-layout dropdown appears — assign the registered algorithm (e.g. Ring), then edit its Settings block (Radius, StartAngle, Clockwise).
Custom layouts are mostly code/asset-driven — the algorithm itself lives in a script that’s registered at startup.
// Register once at startup:CustomLayoutRegistry.Register(new RingLayout());
// Then per element:var layout = GetComponent<AutoLayout>();layout.LayoutType = LayoutType.Custom;layout.CustomLayoutId = "Ring";
When to use a custom layout
Reach for one when:
- You need a non-orthogonal arrangement (radial, hex, polar, conic)
- Children’s positions are computed from a formula, not flow
- You want one-off layouts for a specific screen (Big Map indicators, ability hotbar, etc.)
For tabular and directional auto-layout patterns, prefer Grid and Row & Column — they’re Burst-compiled and far faster than the managed custom-layout path. Custom layouts are designed for typically fewer than 50 children.
The interface
A custom layout implements IHeadlessCustomLayoutAlgorithm (in the AutoLayoutPRO.Custom namespace). It has three methods, one per phase of the layout pipeline:
public interface IHeadlessCustomLayoutAlgorithm{    string Id { get; }
    // Phase 1 (bottom-up): minimum size needed to contain all children.    float2 CalculateIntrinsicSize(UINode[] nodes, LayoutOutput[] outputs,                                   int parentIndex, CustomLayoutSettingsBase settings);
    // Phase 2 (top-down): apply Fill / Percentage sizing to children. Return false to skip.    bool ApplyStretchSizing(UINode[] nodes, LayoutOutput[] outputs,                             int parentIndex, CustomLayoutSettingsBase settings);
    // Phase 3 (top-down): set each child's ResultPosition.    void PositionChildren(UINode[] nodes, LayoutOutput[] outputs,                           int parentIndex, CustomLayoutSettingsBase settings);}
For a uGUI-integrated layout that shows up in the Inspector, also implement ICustomLayoutAlgorithm (extends the headless one with DisplayName, SettingsType, CreateIcon, CreateDefaultSettings).
Settings type
Layout-specific configuration lives in a CustomLayoutSettingsBase subclass. It’s a serialisable POCO — [SerializeReference]-friendly so the Inspector can show fields per layout type.
[Serializable]public class RingLayoutSettings : CustomLayoutSettingsBase{ public float Radius = 100f; public float StartAngle = 0f; public bool Clockwise = true;}A complete worked example: Ring layout
Arranges children evenly around a circle.
using System;using AutoLayoutPRO.Core;using AutoLayoutPRO.Custom;using Unity.Mathematics;using UnityEngine;
[Serializable]public class RingLayoutSettings : CustomLayoutSettingsBase{    public float Radius = 100f;    public float StartAngle = 0f;     // degrees, 0 = right    public bool Clockwise = true;}
public class RingLayout : IHeadlessCustomLayoutAlgorithm{    public string Id => "Ring";
    public float2 CalculateIntrinsicSize(UINode[] nodes, LayoutOutput[] outputs,                                          int parentIndex, CustomLayoutSettingsBase settings)    {        var s = (RingLayoutSettings)settings;        // The ring fits inside a square of side 2 * (radius + maxChildHalfSize).        float maxChildHalf = 0f;        int childIndex = nodes[parentIndex].FirstChildIndex;        while (childIndex != -1)        {            var size = outputs[childIndex].ResultSize;            maxChildHalf = math.max(maxChildHalf, math.max(size.x, size.y) * 0.5f);            childIndex = nodes[childIndex].NextSiblingIndex;        }        float side = 2f * (s.Radius + maxChildHalf);        return new float2(side, side);    }
    public bool ApplyStretchSizing(UINode[] nodes, LayoutOutput[] outputs,                                    int parentIndex, CustomLayoutSettingsBase settings)    {        // Ring doesn't stretch children — they keep whatever size sizing-mode resolved.        return false;    }
    public void PositionChildren(UINode[] nodes, LayoutOutput[] outputs,                                  int parentIndex, CustomLayoutSettingsBase settings)    {        var s = (RingLayoutSettings)settings;        var parentSize = outputs[parentIndex].ResultSize;        float2 center = parentSize * 0.5f;
        // Count children        int count = 0;        int idx = nodes[parentIndex].FirstChildIndex;        while (idx != -1) { count++; idx = nodes[idx].NextSiblingIndex; }        if (count == 0) return;
        float angleStep = 360f / count;        if (!s.Clockwise) angleStep = -angleStep;        float startRad = math.radians(s.StartAngle);
        idx = nodes[parentIndex].FirstChildIndex;        int i = 0;        while (idx != -1)        {            float rad = startRad + math.radians(i * angleStep);            float2 childSize = outputs[idx].ResultSize;            float2 pos = center + new float2(math.cos(rad), math.sin(rad)) * s.Radius - childSize * 0.5f;            outputs[idx].ResultPosition = pos;
            idx = nodes[idx].NextSiblingIndex;            i++;        }    }}
Registering and using
Register once at startup; assign by ID per AutoLayout component.
[RuntimeInitializeOnLoadMethod]static void RegisterCustomLayouts(){ CustomLayoutRegistry.Register(new RingLayout());}Then per element:
// Code:var layout = GetComponent<AutoLayout>();layout.LayoutType = LayoutType.Custom;layout.CustomLayoutId = "Ring";// (Settings are exposed via the registered ICustomLayoutAlgorithm.SettingsType.)
// Inspector:// 1. Set Layout Type to Custom// 2. Pick "Ring" from the Custom Layout dropdown// 3. Configure Radius / StartAngle / Clockwise in the appearing settings block
CustomLayoutRegistry API
| Method | Description |
|---|---|
Register(IHeadlessCustomLayoutAlgorithm) | Register a layout |
Unregister(string id) | Remove a registered layout |
Get(string id) | Retrieve a registered layout |
Contains(string id) | Check existence |
GetAll() | All registered layouts |
Refresh() | Re-initialise (Editor reload safety) |
Tips
- Padding —
PositionChildrenshould respect the parent’sPaddingif your layout has any concept of inset. Read it fromnodes[parentIndex].Padding. - Fill / Percentage sizing — only handle in
ApplyStretchSizingif you actually want to stretch children. Most decorative layouts (radial, hex) ignore it and returnfalse. - Performance — custom layouts run in managed code, not Burst. Keep the per-child work tight (no LINQ, no string allocs, no
GetComponentcalls). - The AutoLayout engine doesn’t ship Ring/Radial/Hex out of the box — they’re customer-implementable layouts. Use the example above as a starting point.